If you do not have GoCD installed, please download and follow the installation checklist.
Download GoCD
In the GoCD ecosystem, the server is the one that controls everything. It provides the user interface to users of the system and provides work for the agents to do. The agents are the ones that do any work (run commands, do deployments, etc) that is configured by the users or administrators of the system.
The server does not do any user-specified "work" on its own. It will not run any commands or do deployments. That is the reason you need a GoCD Server and at least one GoCD Agent installed before you proceed.
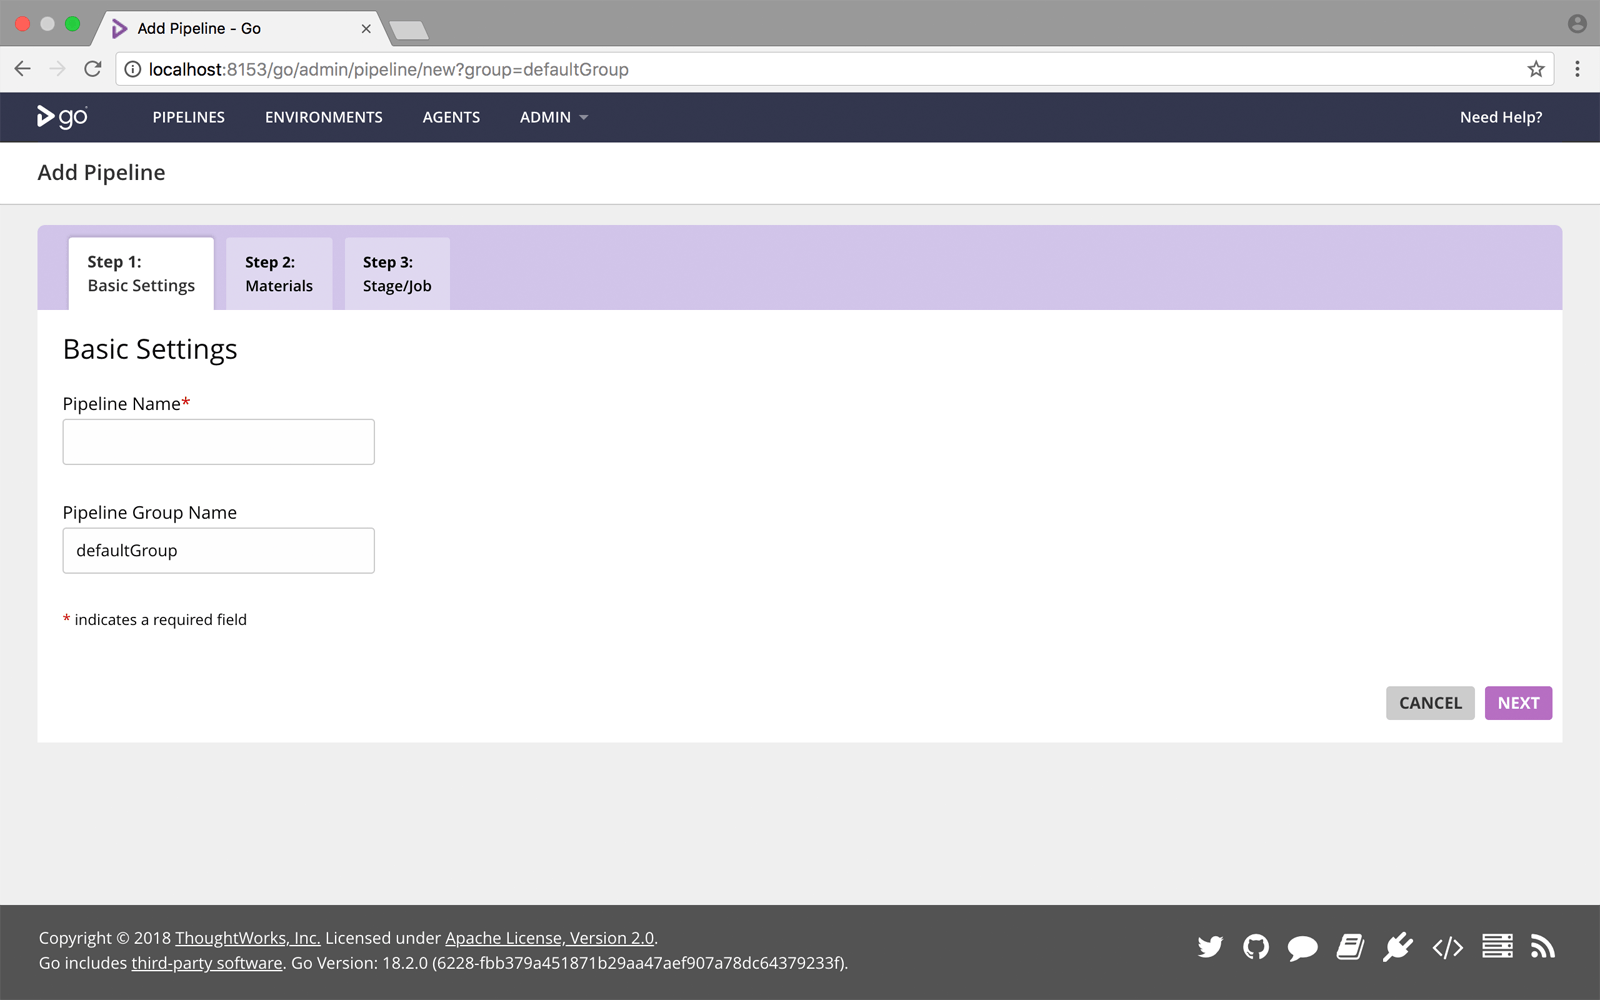
Once you have them installed and running, you should see a screen similar to this, if you navigate to the home page in a web browser (defaults to: http://localhost:8153):
If you have installed the GoCD Agent properly and click on the "Agents" link in the header, you should see an idle GoCD agent waiting (as shown below). If you do not, head over to the troubleshooting page to figure out why.
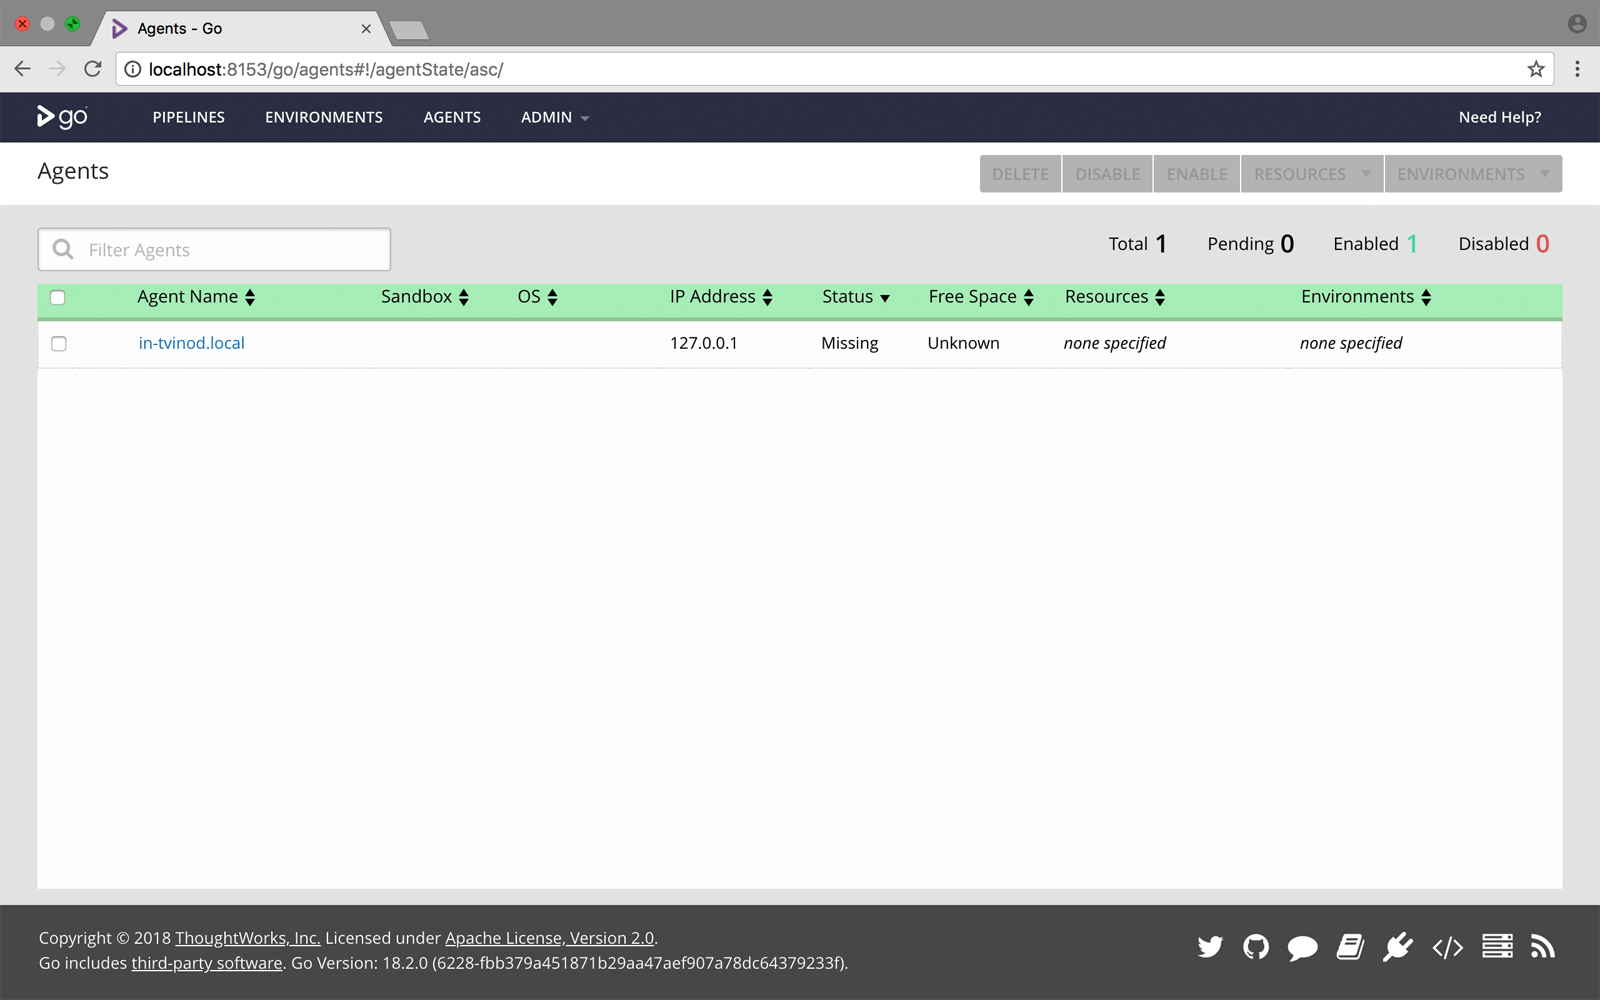
Congratulations! You're on your way to using GoCD. If you now click "Pipelines", you'll get back to the "Add pipeline" screen you saw earlier.
Before creating a pipeline, it might help to know what it is and concepts around it.

A pipeline, in GoCD, is a representation of workflow or a part of a workflow. For instance, if you are trying to automatically run tests, build an installer and then deploy an application to a test environment, then those steps can be modeled as a pipeline. GoCD provides different modeling constructs within a pipeline, such as stages, jobs and tasks. We will see these in more detail soon. For the purpose of this part of the guide, you need to know that a pipeline can be configured to run a command or set of commands.
Another equally important concept is that of a material. A material is a cause for a pipeline to "trigger" or to start doing what it is configured to do. Typically, a material is a source control repository (like Git, Subversion, etc) and any new commit to the repository is a cause for the pipeline to trigger. A pipeline needs to have at least one material and can have as many materials of different kinds as you want.
The concept of a pipeline is extremely central to Continuous Delivery. Together with the concepts of stages, jobs and tasks, GoCD provides important modeling blocks which allow you to build up very complex workflows, and get feedback quicker. You'll learn more about GoCD pipelines and Deployment pipelines in the upcoming parts of this guide. In case you cannot wait, Martin Fowler has a nice and succinct article here.
Now, back at the "Add pipeline" screen, let's provide the pipeline a name, without spaces, and ignore the "Pipeline Group" field for now.
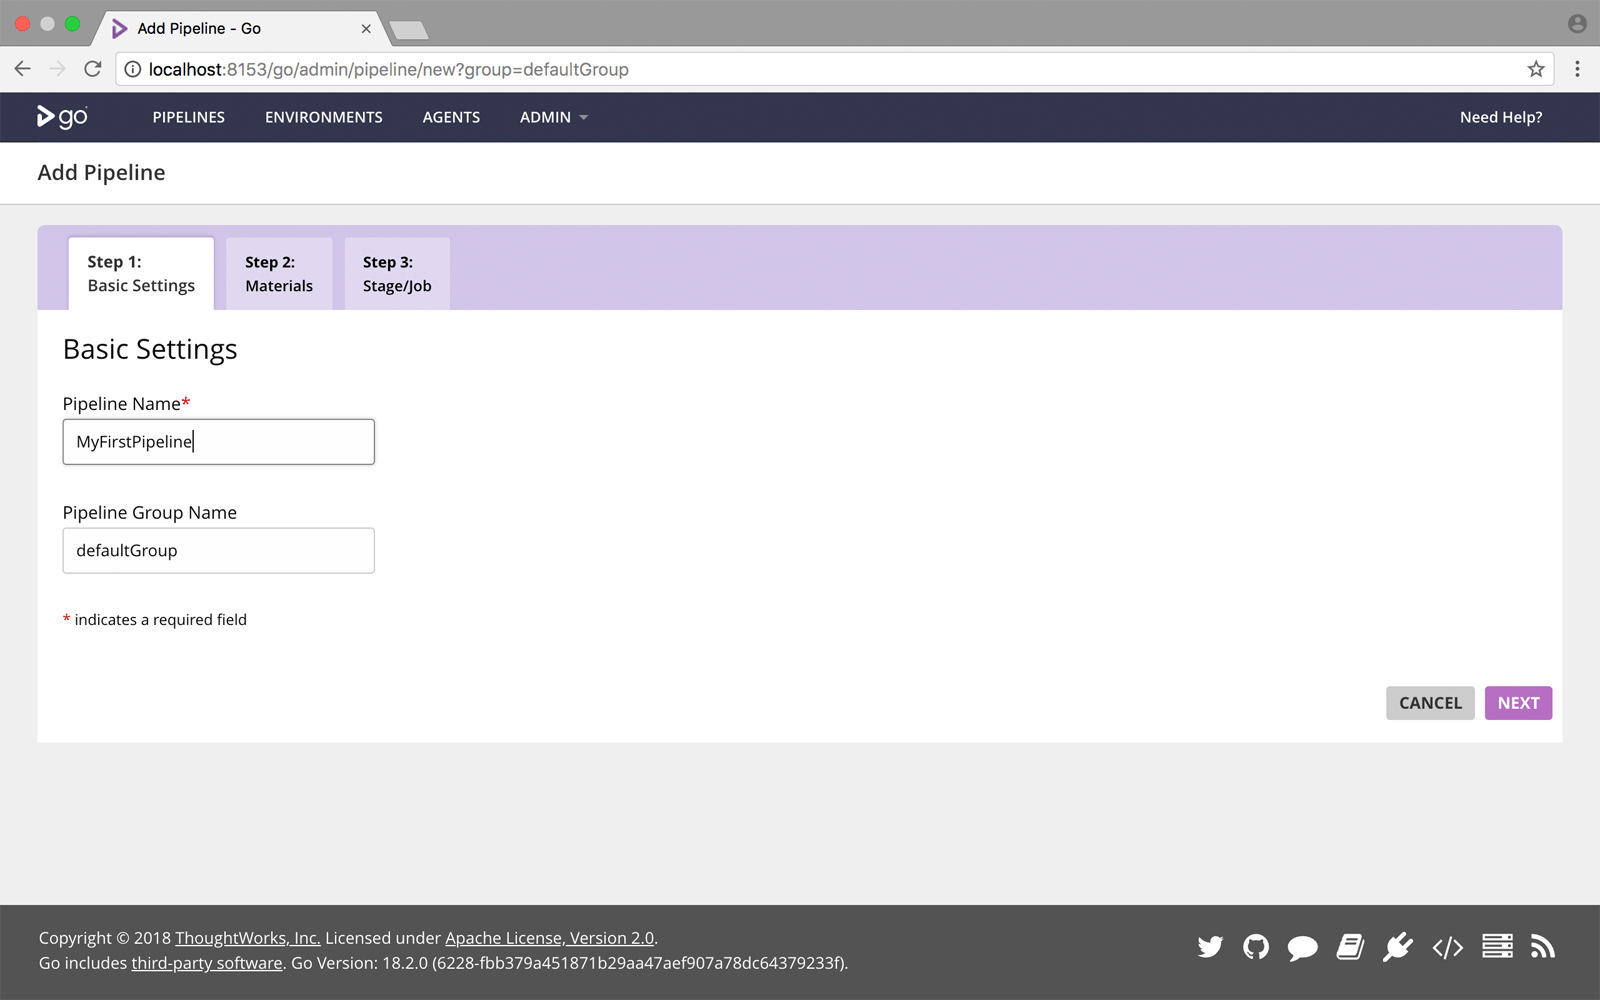
Pressing "Next" will take you to step 2, which can be used to configure a material.
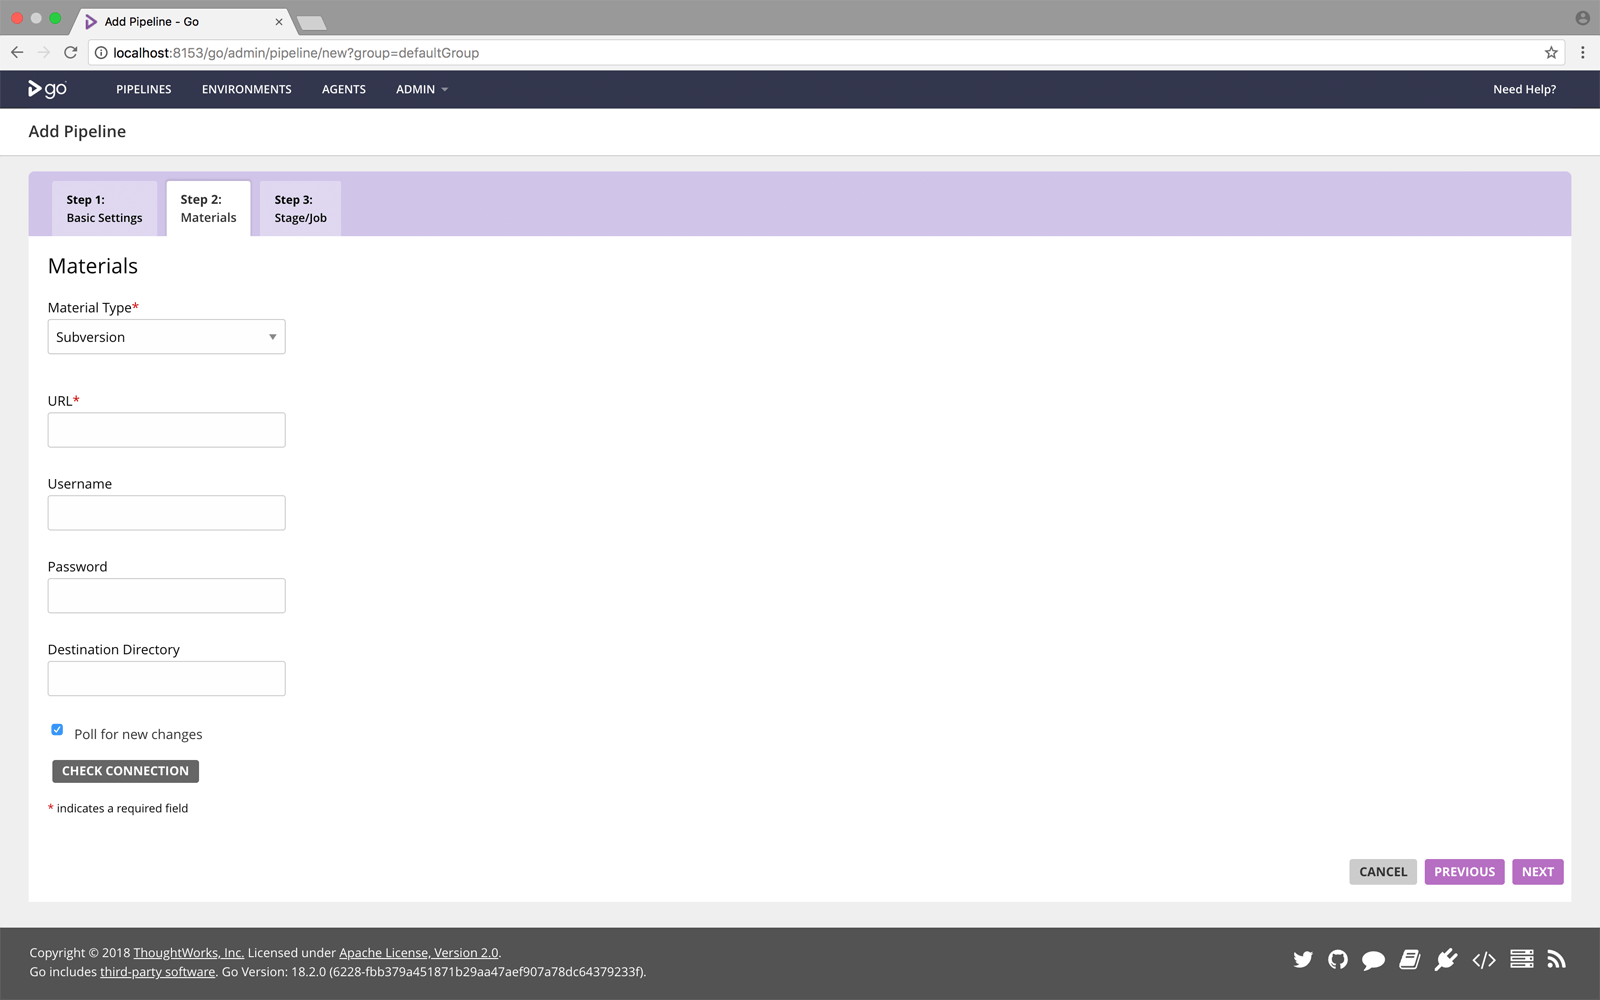
You can choose your own material here [1], or use a Git repository available on GitHub for this guide. The URL of that repository is: https://github.com/gocd-contrib/getting-started-repo.git. You can change "Material Type" to "Git" and provide the URL in the "URL" textbox. If you now click on the "Check Connection" button, it should tell you everything is OK.
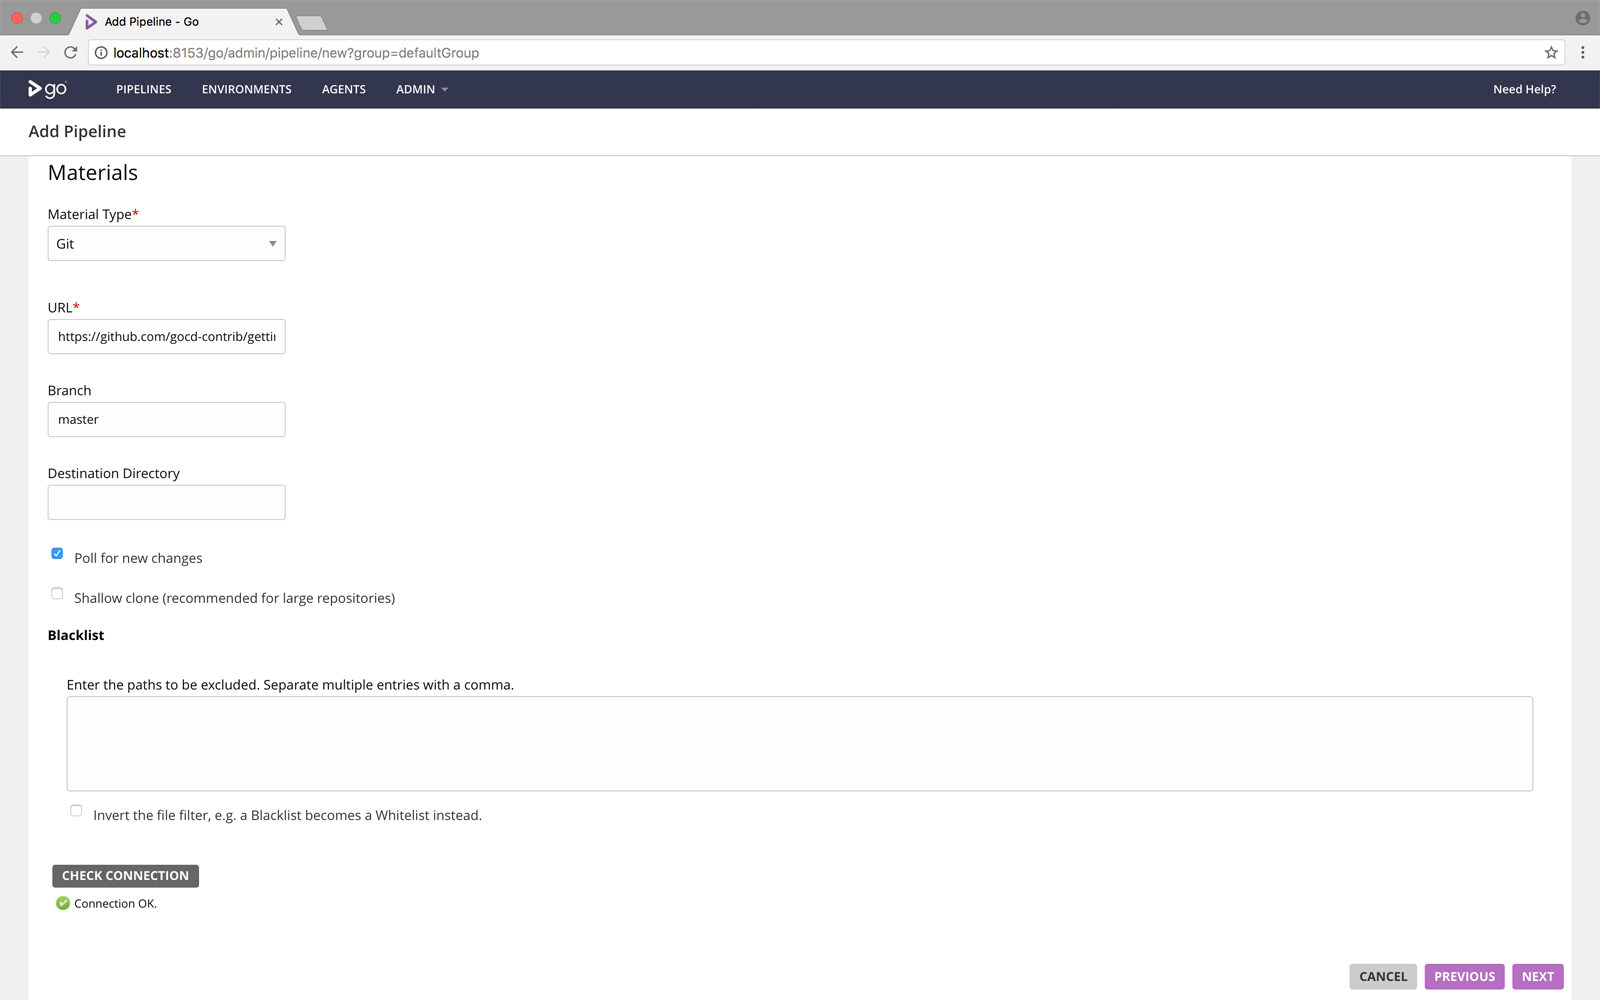
This step assumes that you have git installed on the GoCD Server and Agent. Like git, any other commands you need for running your scripts need to be installed on the GoCD Agent nodes.
If you had trouble with this step, and it failed, take a look at the troubleshooting page in the documentation. If everything went well, press "Next" to be taken to step 3, which deals with stages, jobs and tasks.
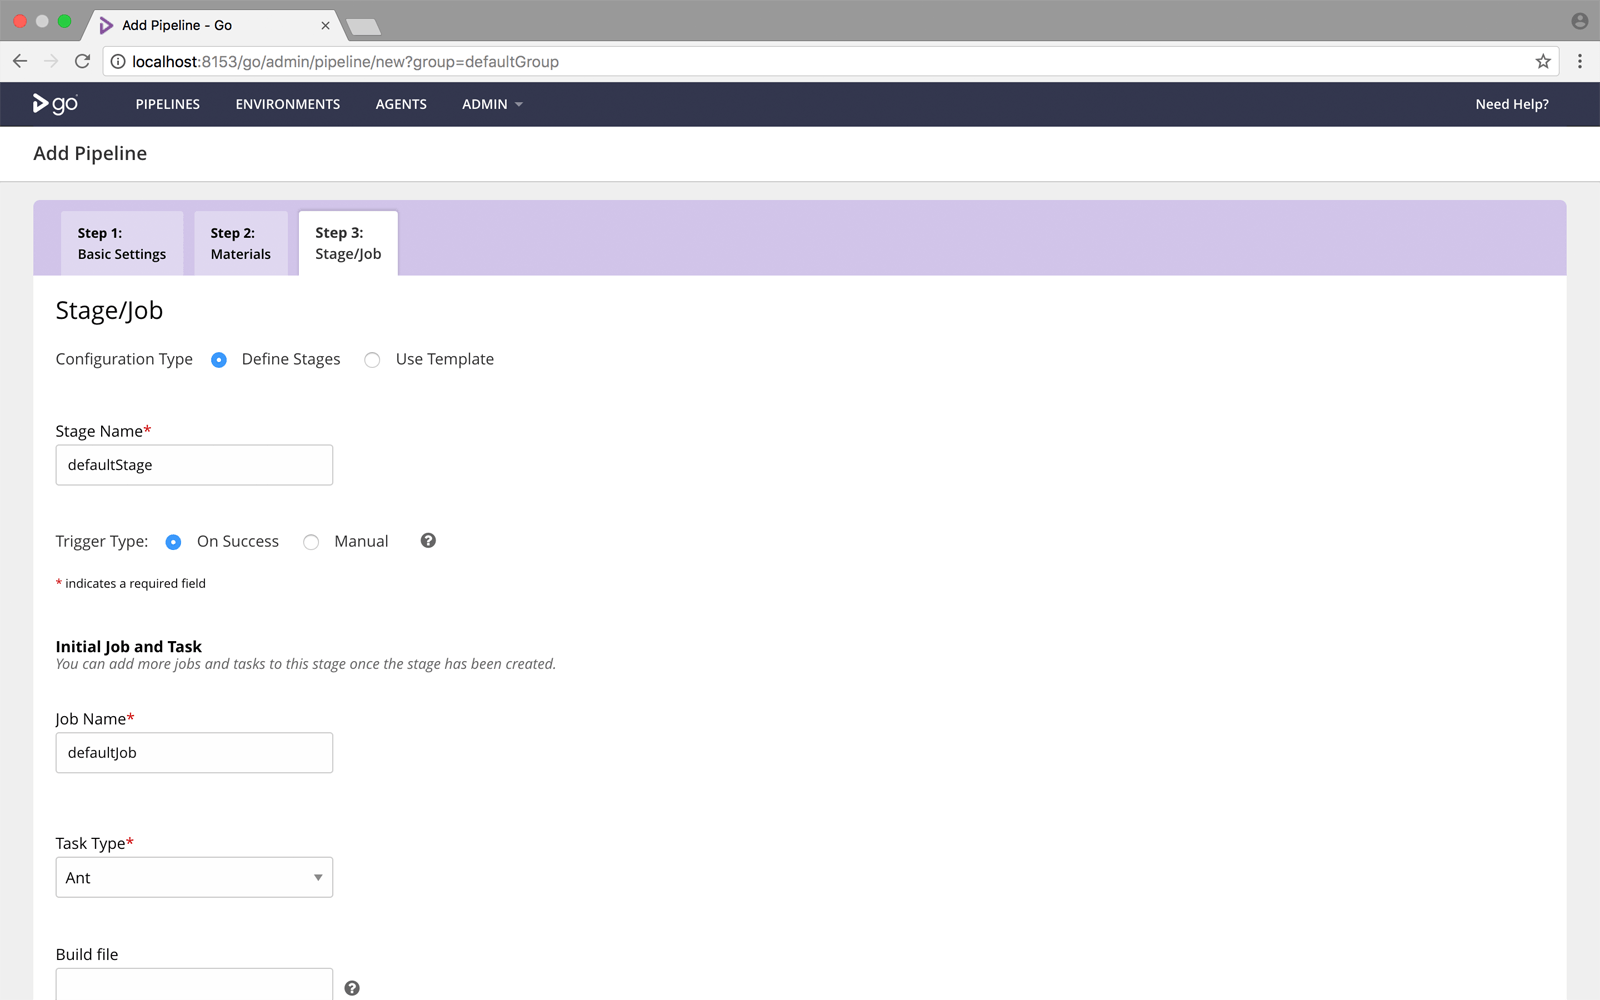
Since a stage name and a job name are populated, and in the interest of quickly achieving our goal of creating and running a pipeline in GoCD, let us delay understanding the (admittedly very important) concepts of stage and job and focus on a task instead. Scrolling down a bit, you'll see the "Initial Job and Task" section.
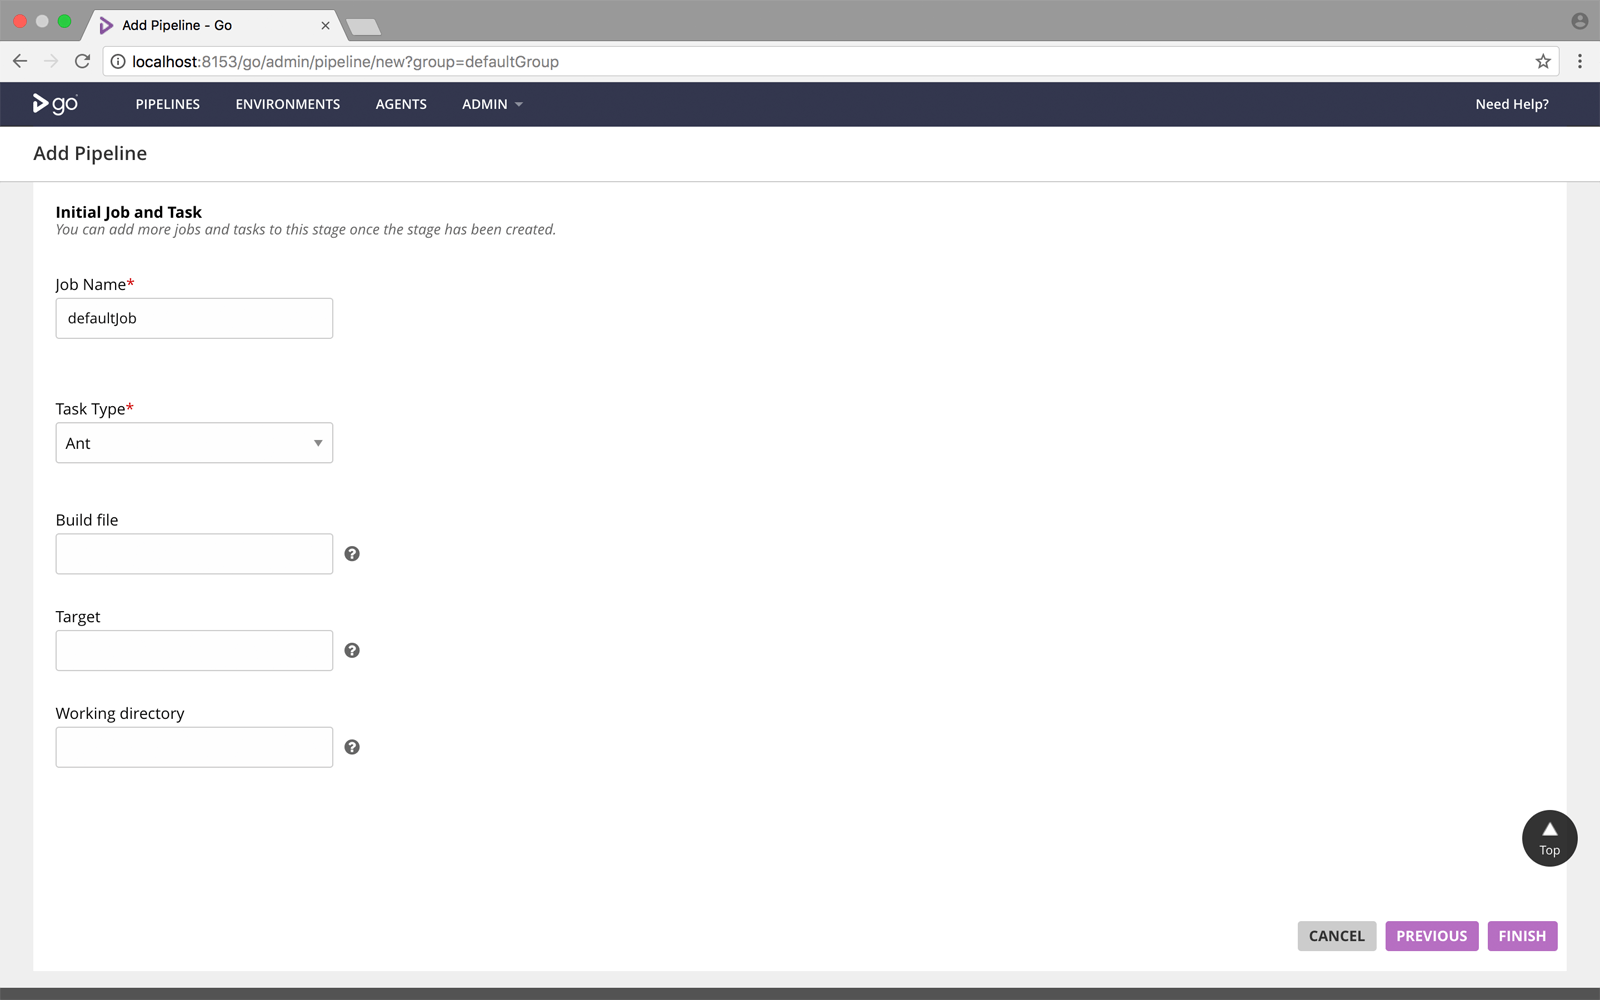
Since we don't want to use "Ant" right now, let's change the "Task Type" to "More...". You should see a screen like this:
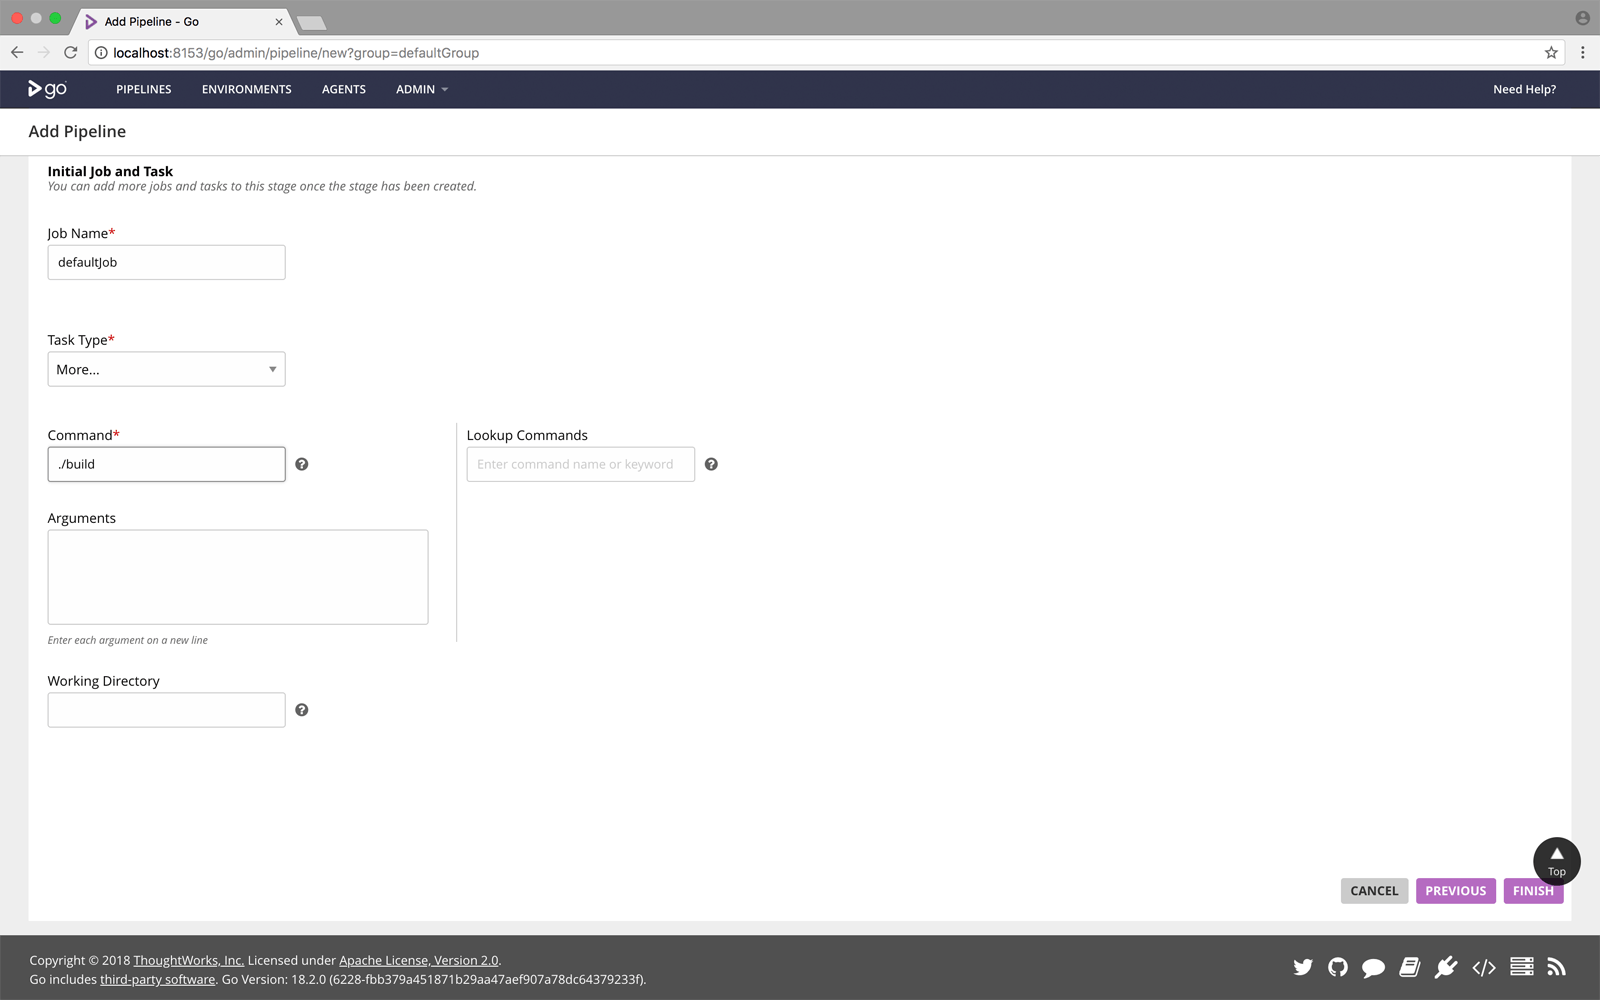
Change the text of the "Command" text box to "./build" (that is, dot forward-slash build) and press "Finish". If all went well, you just created your first pipeline! Leaving you in a screen similar to the one shown below.
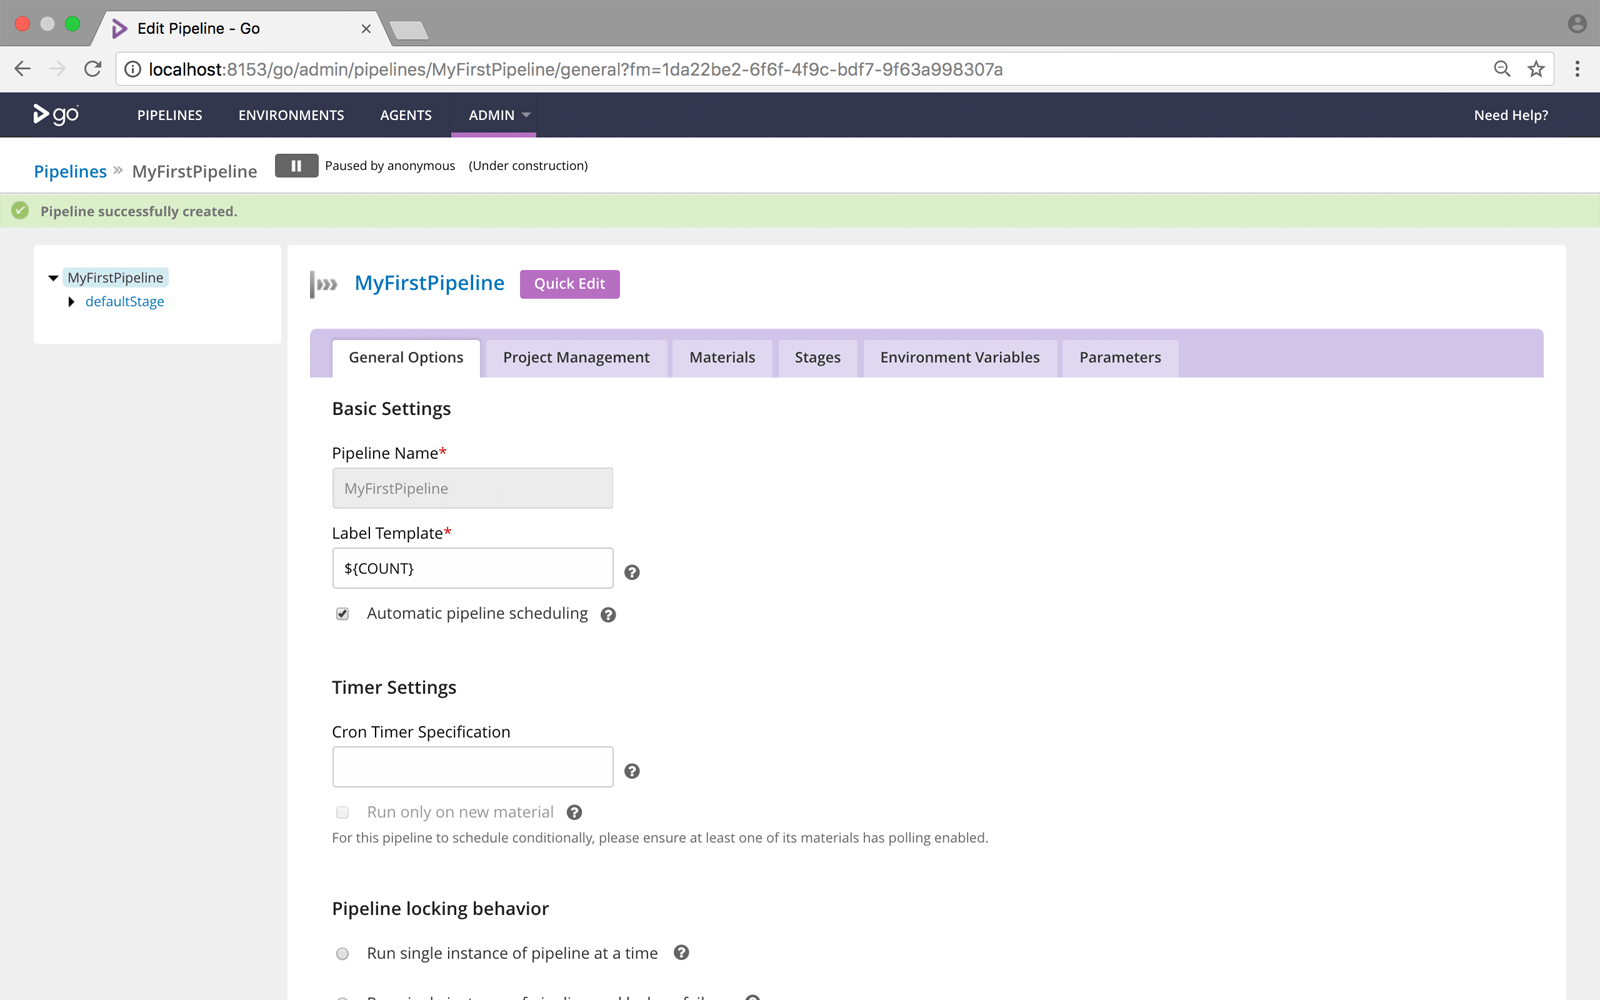
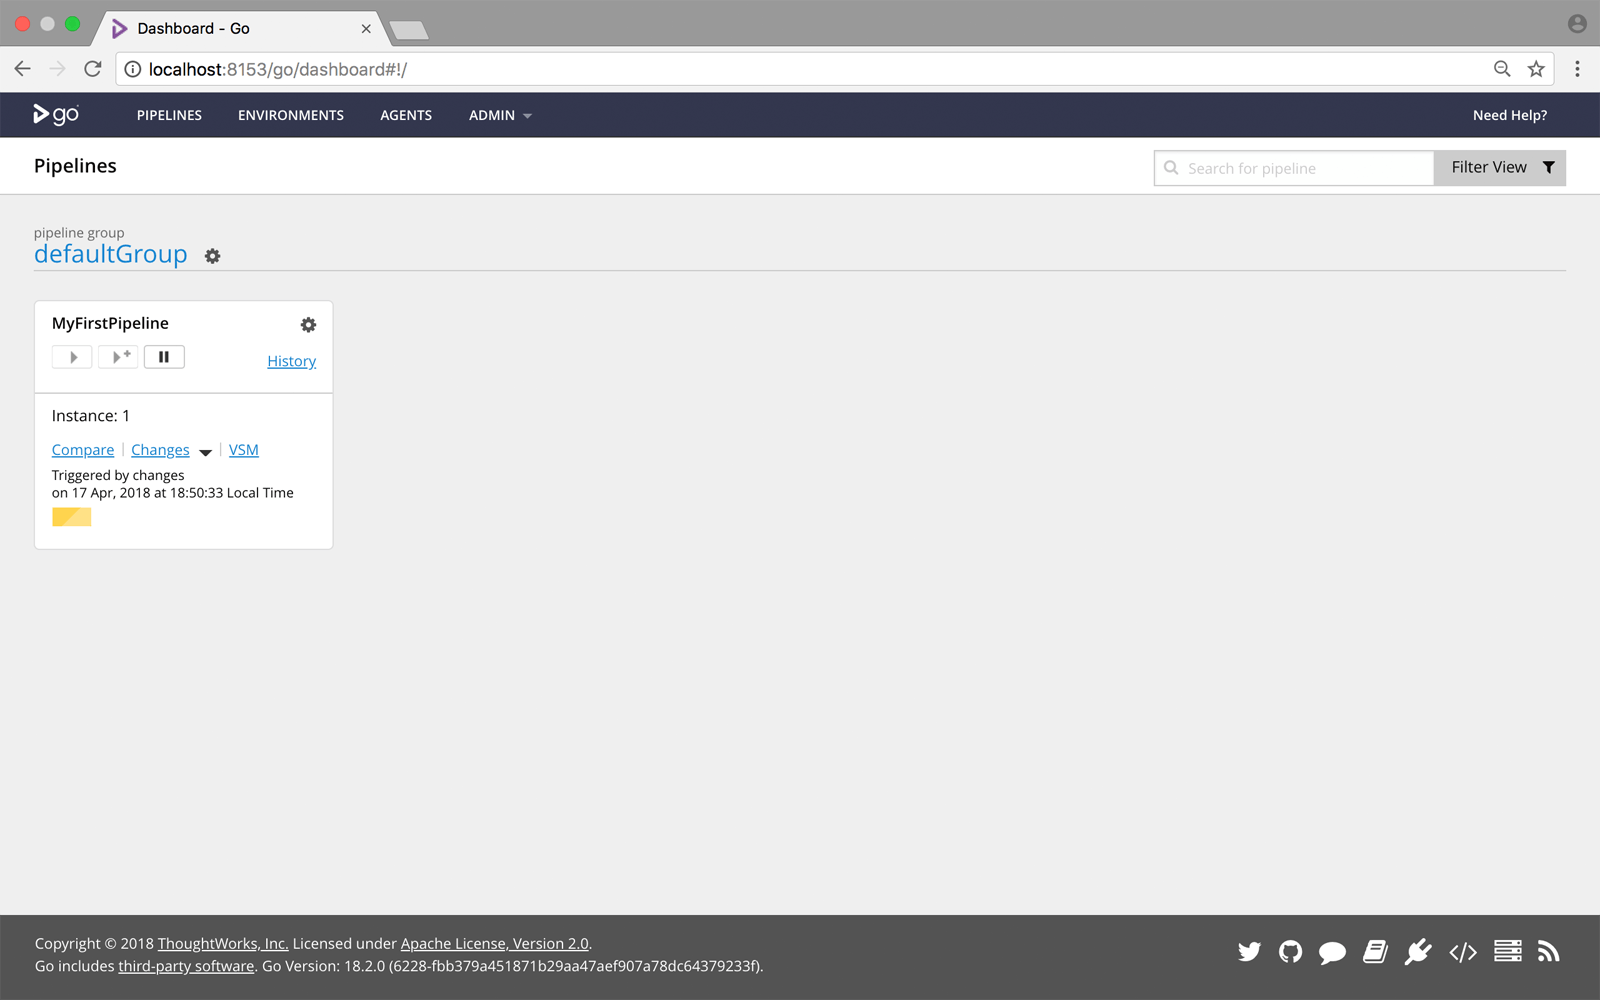
Helpfully, the pipeline has been paused for you (see the pause button and the text next to it, right next to the pipeline name). This allows you to make more changes to the pipeline before it triggers. Usually, pipeline administrators can take this opportunity to add more stages, jobs, etc. and model their pipelines better. For the purpose of this guide, let's just un-pause this pipeline and get it to run. Click on the blue "pause" button and then click on the "Pipelines" link in the header.
If you give it a minute, you'll see your pipeline building (yellow) and then finish successfully (green):
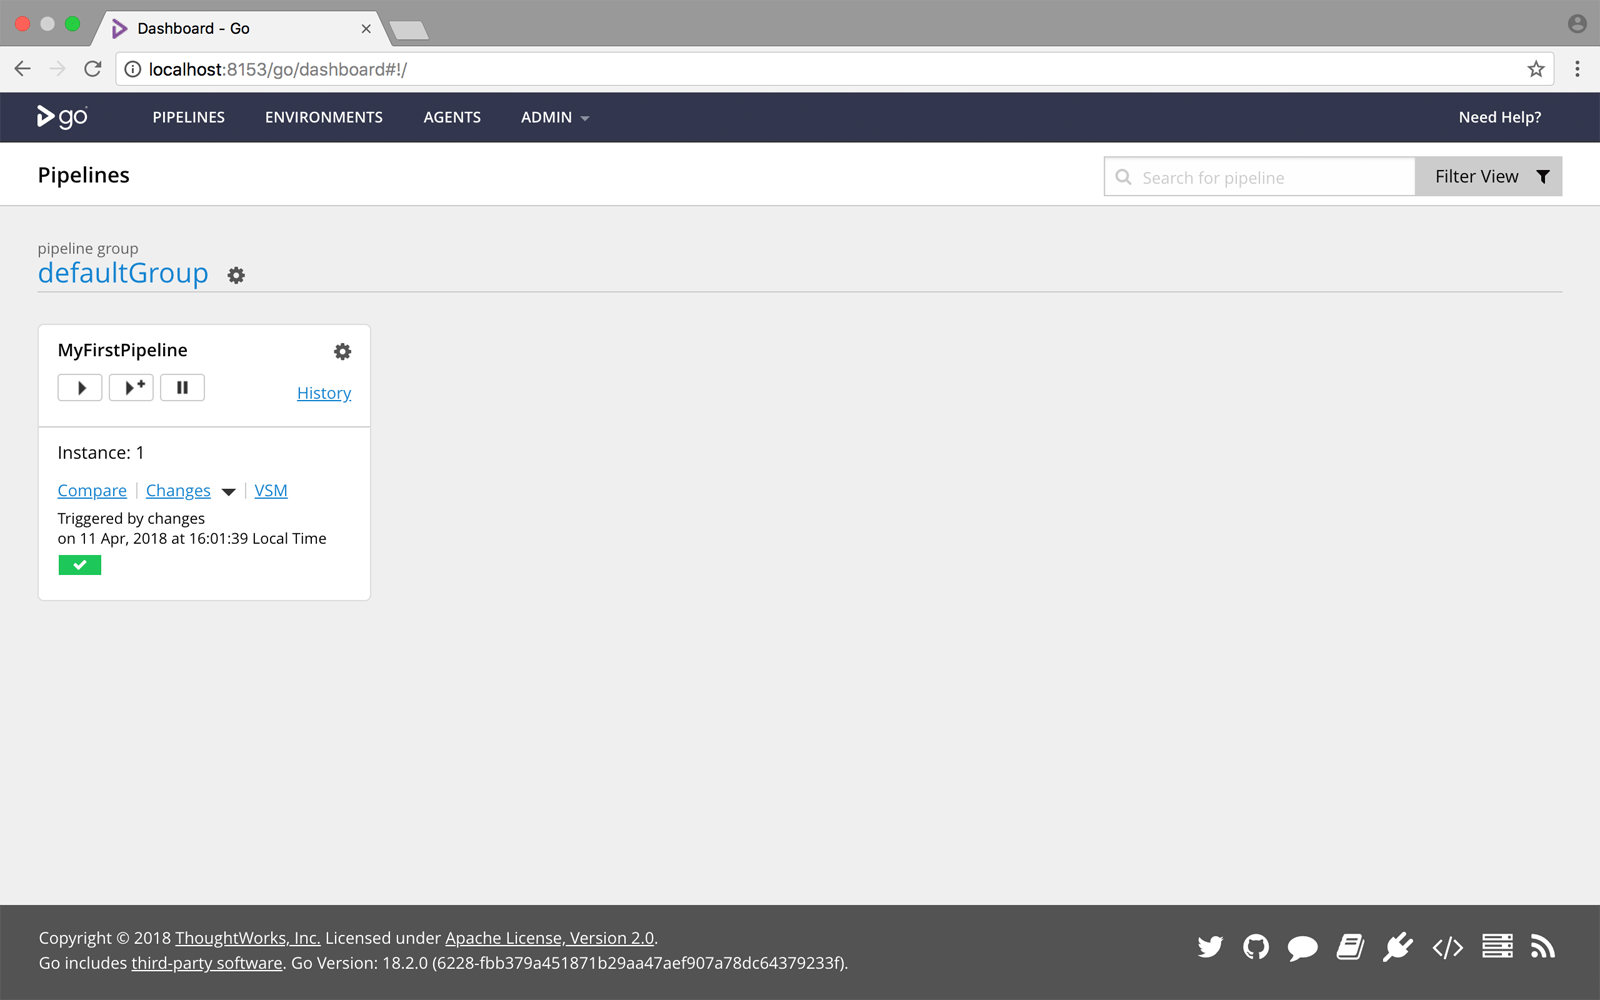
Clicking on the bright green bar will show you information about the stage:
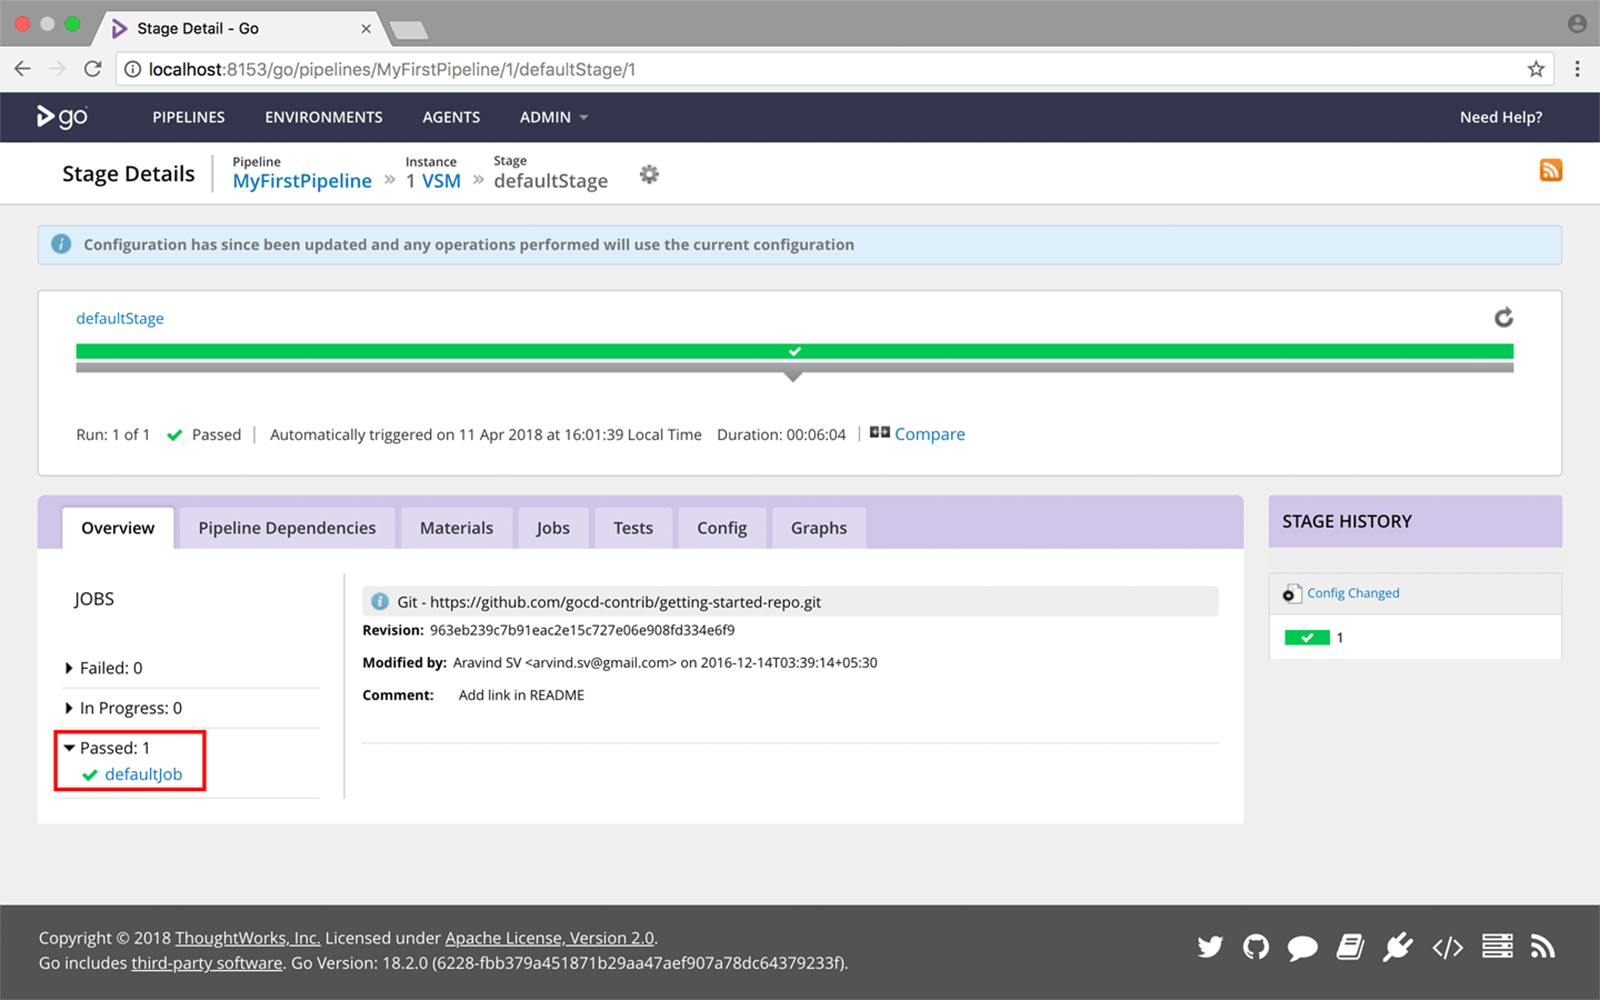
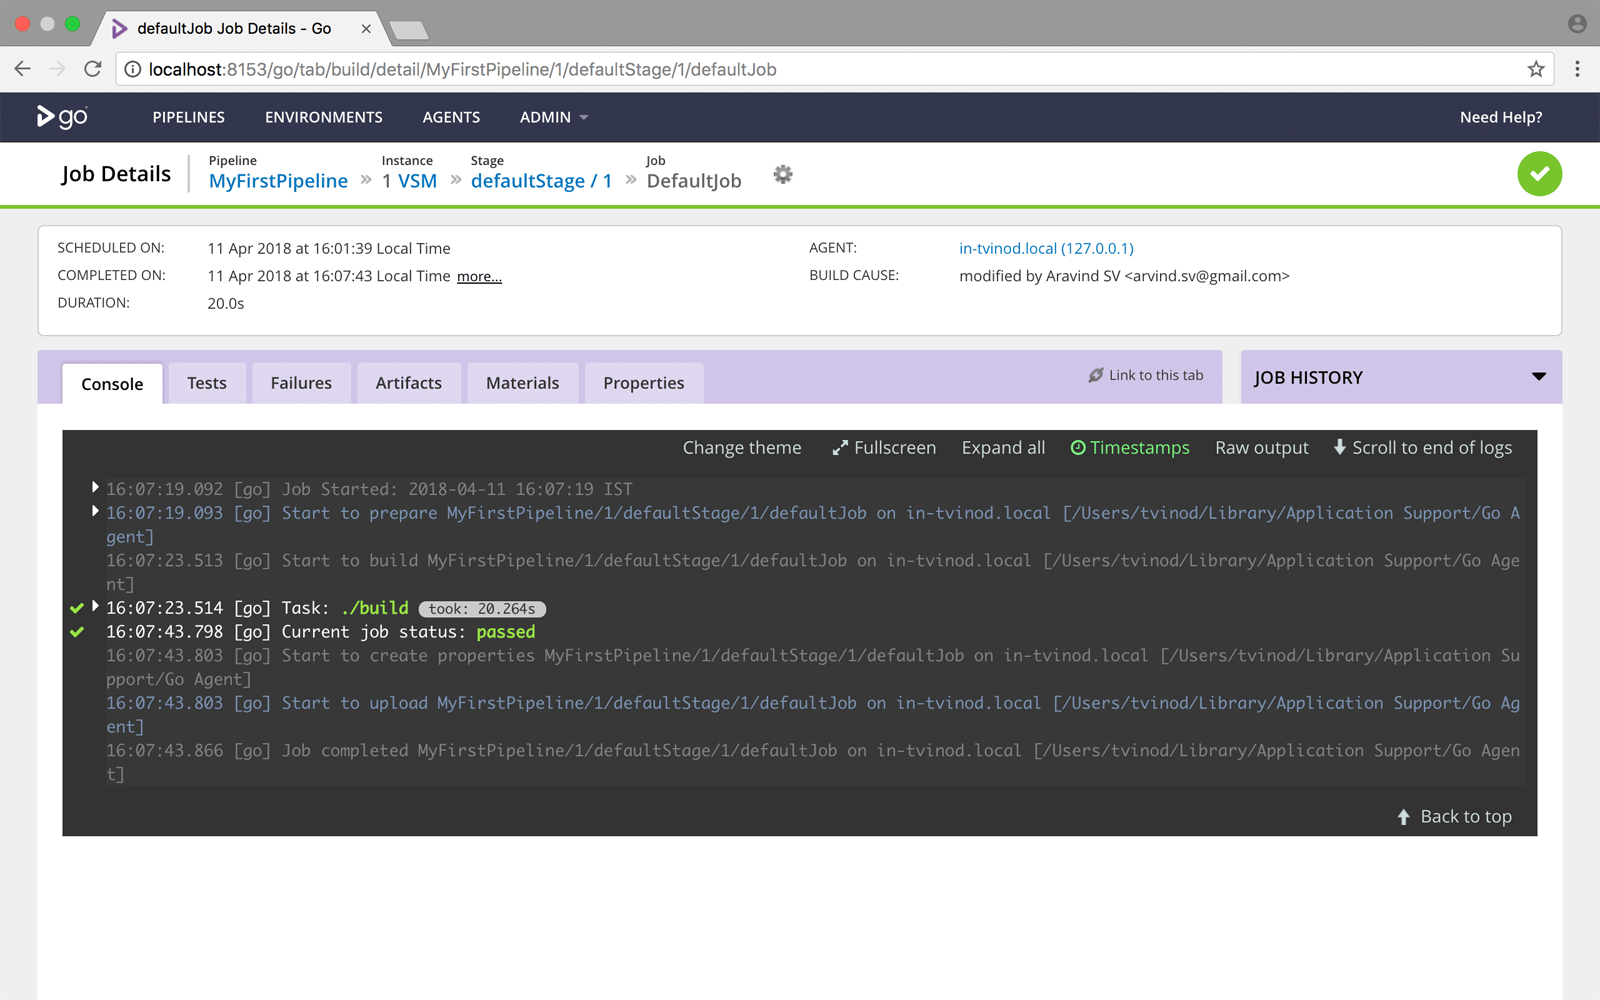
and then clicking on the job will take you to the actual task and show you what it did:
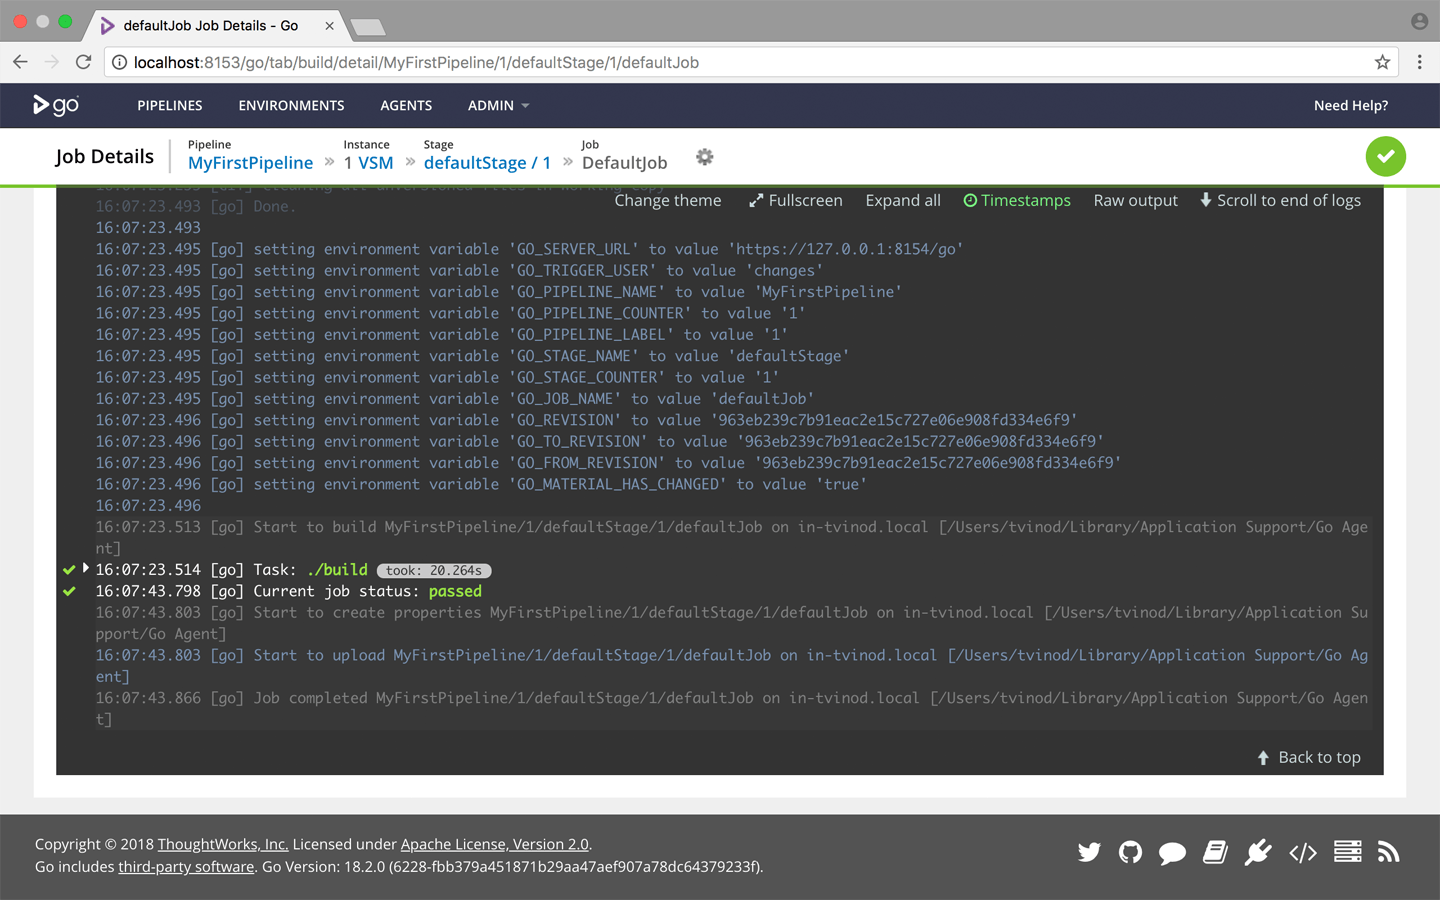
Scrolling up a bit, you can see it print out the environment variables for the task and the details of the agent this task ran on (remember "Concept 1"?).
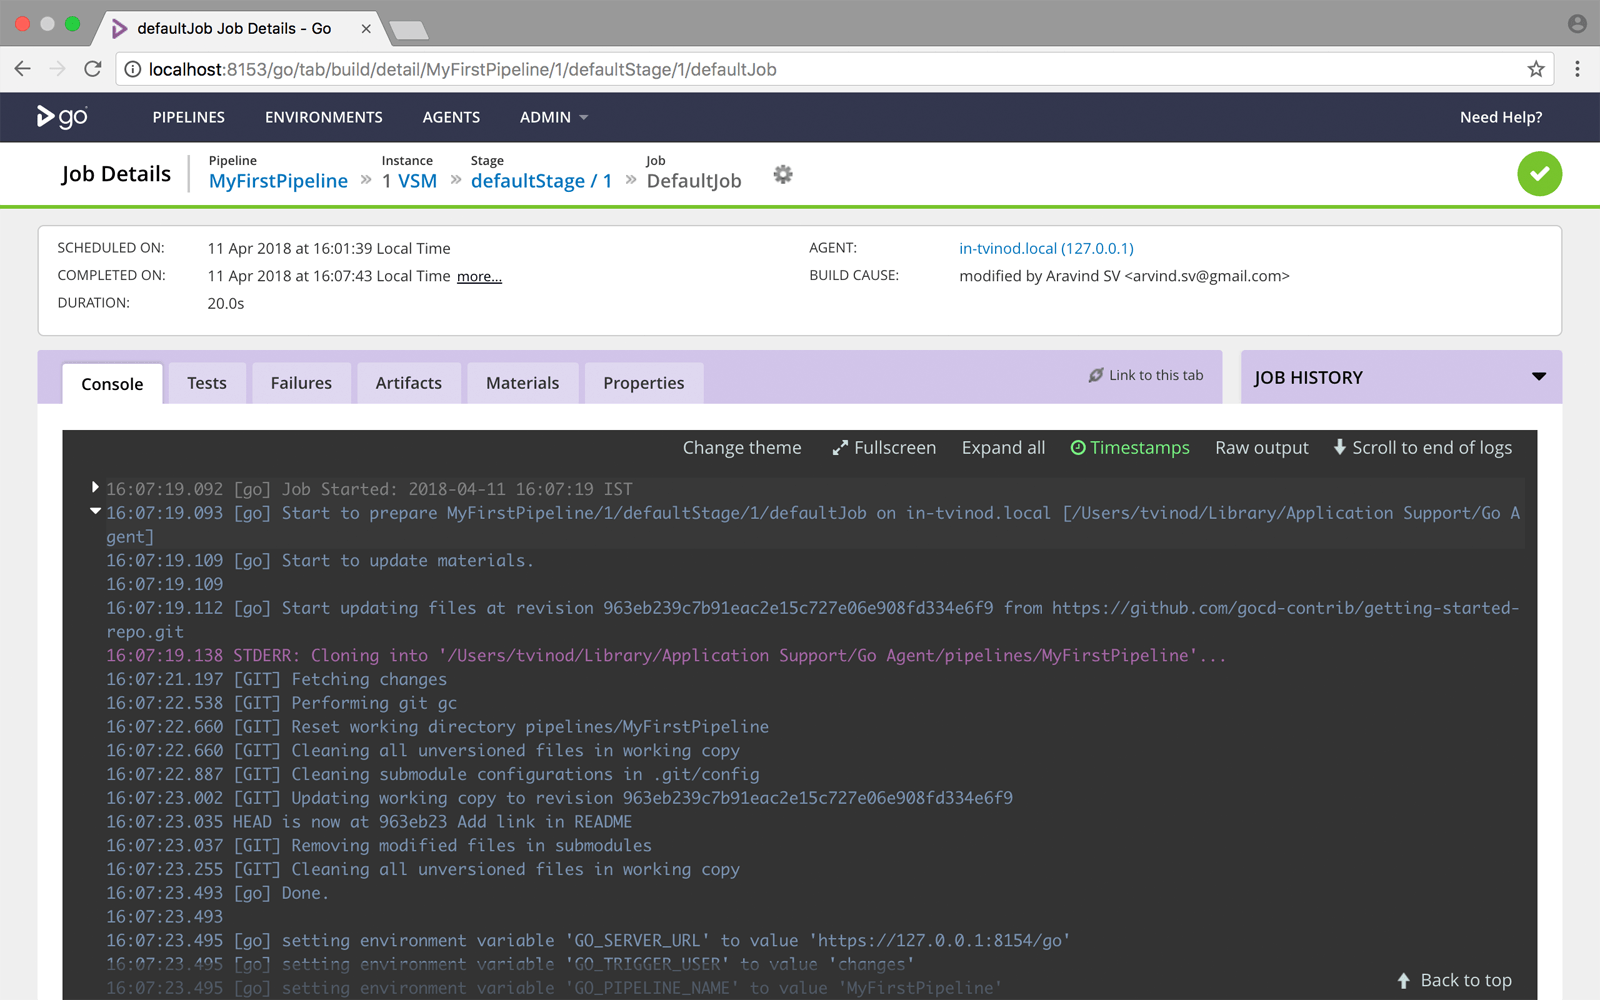
Did you notice the lines at the top of the build which said: "Start updating files at revision ..."? This is the agent preparing to run the job configured. Every material configured for that pipeline will be updated to the correct revision, so that it is consistent with the rest of the pipeline and the system as a whole.
Once the material is checked out (if it is the first time it is ever used) and updated to the correct revision, it will be available for use in a task. That is the reason the build script, "./build" was available without you having to do anything. It is found inside the configured Git repository material.
In this case, we had only one material, and so we could use it as "./build". If you had configured more materials, you'd need to provide a working directory for each material and would have had to use the script as "./material1/build" (for instance).
Notice that the GoCD Agent independently checks out the repository, meaning that the version control systems of your materials (Git, SVN, etc) need to be available on the GoCD Agent as well.
Now that you have a basic idea of a pipeline and what it does, let's understand more about its components.

A pipeline consists of one or more "stages", each stage consists of one or more "jobs" and each job is made up of one or more "tasks". All of these are modeling constructs within a pipeline. Starting from the smallest piece:
Circling back to the pipeline we created in this guide: The pipeline had one stage called "defaultStage" and one job in that stage called "defaultJob" and had only one task in that - a custom command task, which ran: "./build".
This is just the tip of the iceberg in terms of GoCD's features and capabilities. In the upcoming parts of this guide, you will learn more about some more of GoCD's core features, such as fan-in, fan-out, artifact promotion, pipeline dependencies, value stream maps and more.
Let's start, in Part 2 of this guide, where you can learn about pipeline dependencies and artifacts.
[1] If you're used to using Git or any version control system used by GoCD, you can clone your repository locally and provide that path instead of using the repository on GitHub used in this guide. That way, you can make commits to your repository and see pipelines triggering because of them.